OneSignal


Overview
OneSignal is a tool that allows you to send messages across different channels such as the following to keep your users engaged.
- Push notifications
- SMS
- Emails
- In-app notifications
Combined with Supabase Database Webhooks and you can provide realtime cloud messaging experience to your users.
You can get started with OneSignal and Supabase here.
Documentation
OneSignal is a tool that allows you to send messages across different channels such as the following to keep your users engaged.
- Push notifications
- SMS
- Emails
- In-app notifications
Here is William giving us the overview of how OneSignal can work with Supabase to send notifications to your users.
In this guide, we will build a similar app and steps you through how you can integrate OneSignal with Supabase to create a seamless cloud messaging experience for your users using Database webhooks and edge functions through a simple Next.js application.

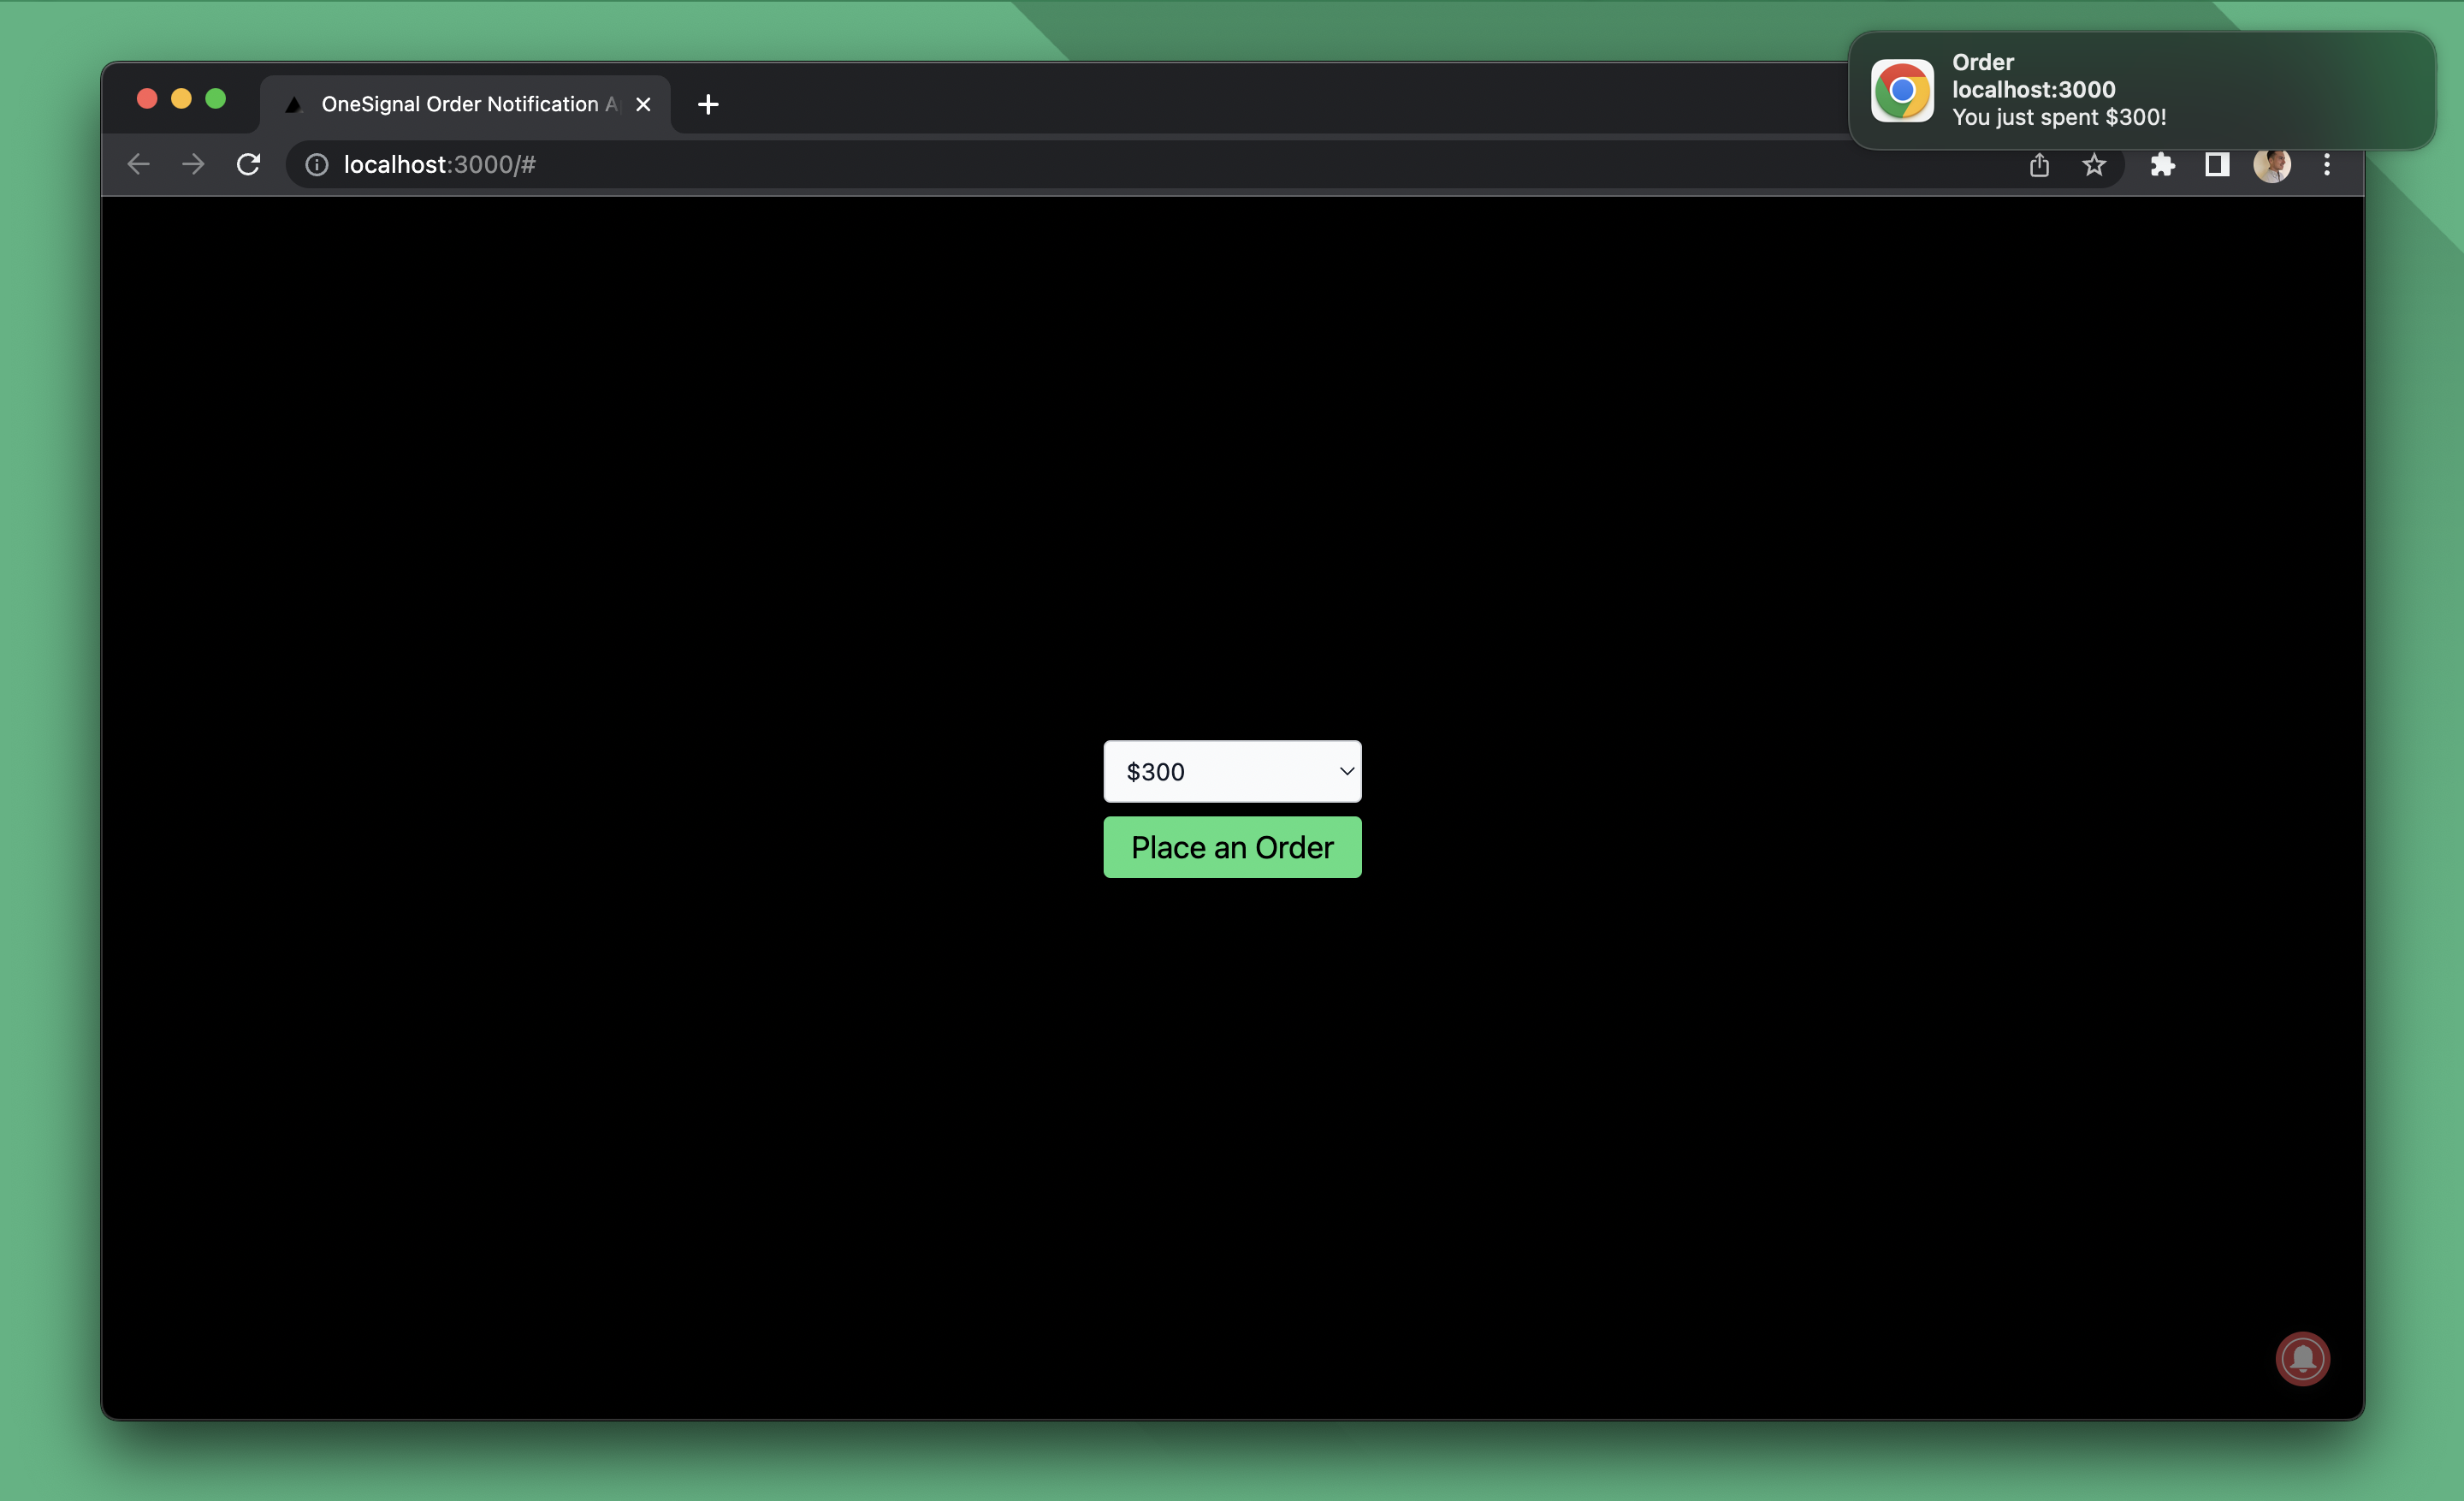
We will create a simple ordering app and use Supabase Database Webhooks in conjunction with Edge Function to provide a real-time push notification experience.
You can find the complete example app along with the edge functions code to send the notifications here.
Step 1: Getting started
Before we dive into the code, this guide assumes that you have the following ready
- Supabase project created
- OneSignal app created
- Supabase CLI installed on your machine
Let’s create a Next.js app with tailwind CSS pre-installed
We will then install the Supabase and OneSignal SDK.
After that, follow the instructions here to set up OneSignal for the web. You can set the URL of the app as a local host if you want to run the app locally, or add a remote URL if you want to deploy your app to a public hosting. You should add the file you obtain in step 4 of the instruction under the public directory of your Next.js app like this.
Step 2: Build Next.js app
The Next.js app will have a login form for the user to sign in, and a button that they can press to make an order once they are signed in. Update the index.tsx file to the following.
There is quite a bit of stuff going on here, but basically, it’s creating a simple UI for the user to sign in using the magic link, and once the user is signed in, will initialize OneSignal to ask the user to receive notifications on the website.
Notice that inside the initializeOneSignal() function, we use the Supabase user ID a to log the user into OneSignal. This allows us to later send push notifications to the user using their Supabase user ID from the backend, which is very handy.
The front-end side of things is done here. Let’s get into the backend.
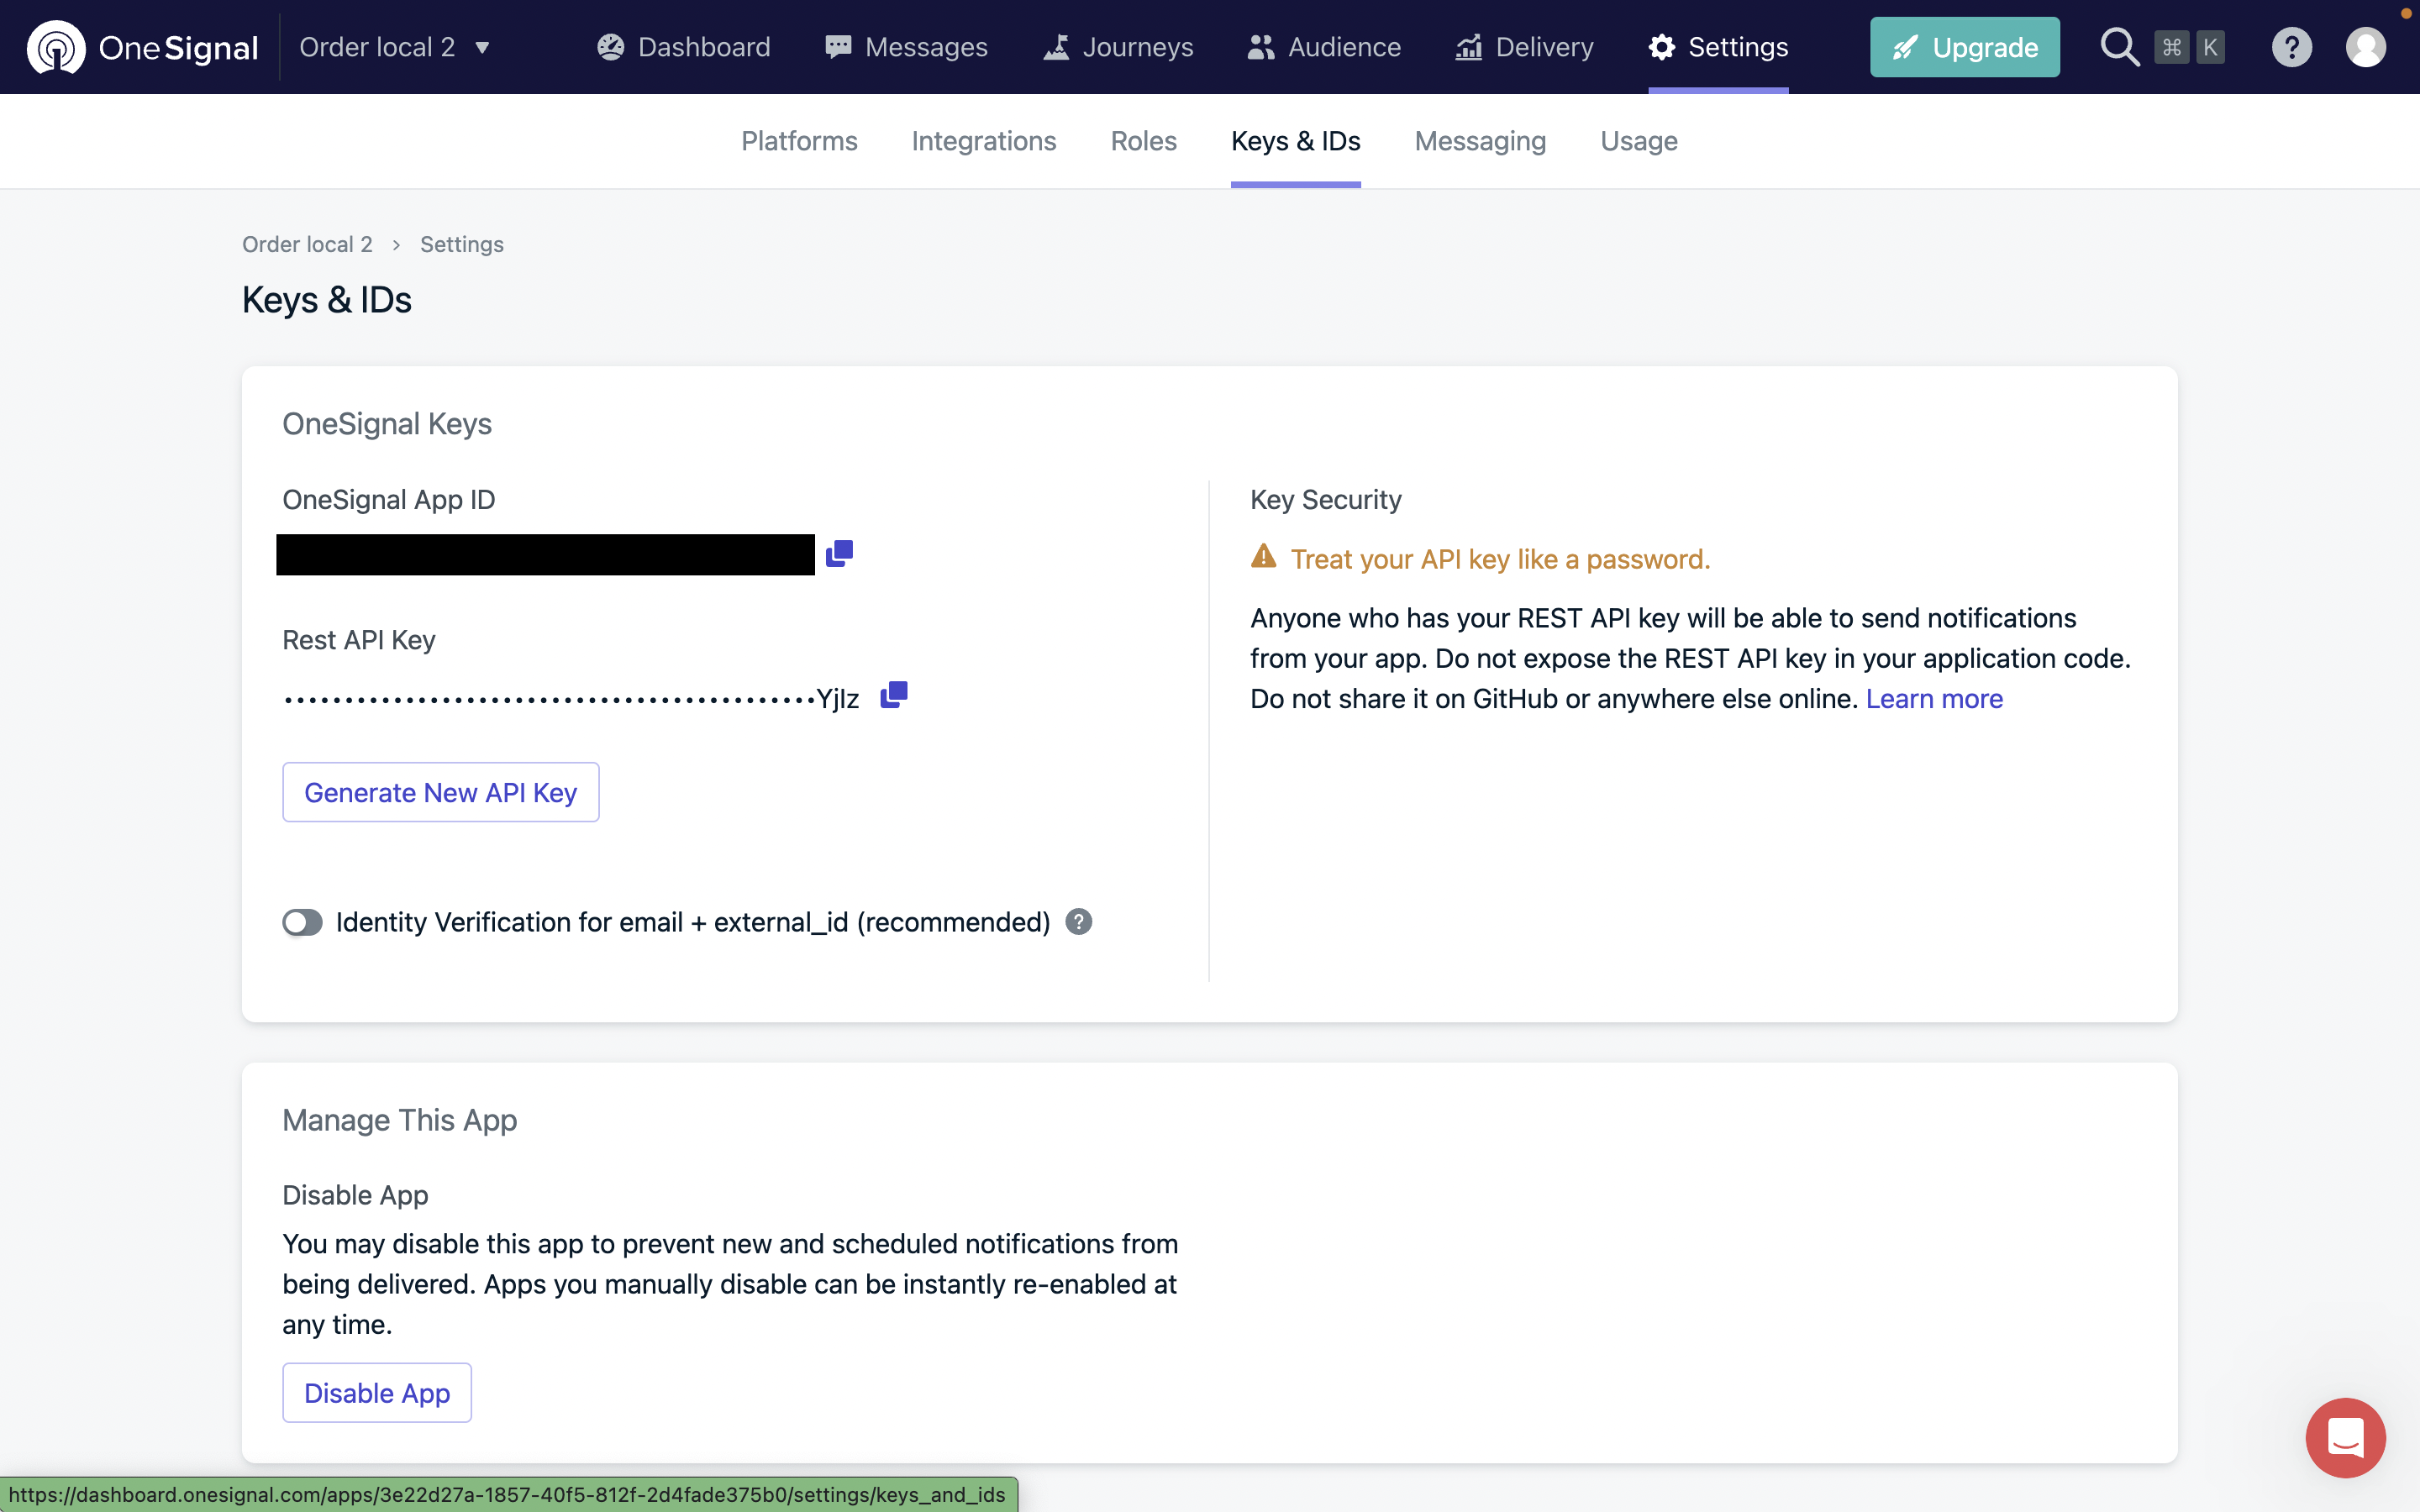
We also need to set our environment variables. Create a .env.local file and use the following template to set the environment variables. You can find your Supabase configuration in your dashboard under settings > API, and you can find the OneSignal app ID from Settings > Keys & IDs
Step 3: Create the Edge Function
Let’s create an edge function that will receive database webhooks from the database and calls the OneSignal API to send the push notification.
Replace the contents of supabase/functions/notify/index.ts with the following
If you see bunch of errors in your editor, it's because your editor is not configured to use Deno. Follow the official setup guide here to setup your IDE to use Deno.
The function receives a record object, which is the row inserted in your orders table, and constructs a notification object to then send to OneSignal to deliver the push notification.
We also need to set the environment variable for the function. Create a .env file under your supabase directory and paste the following.
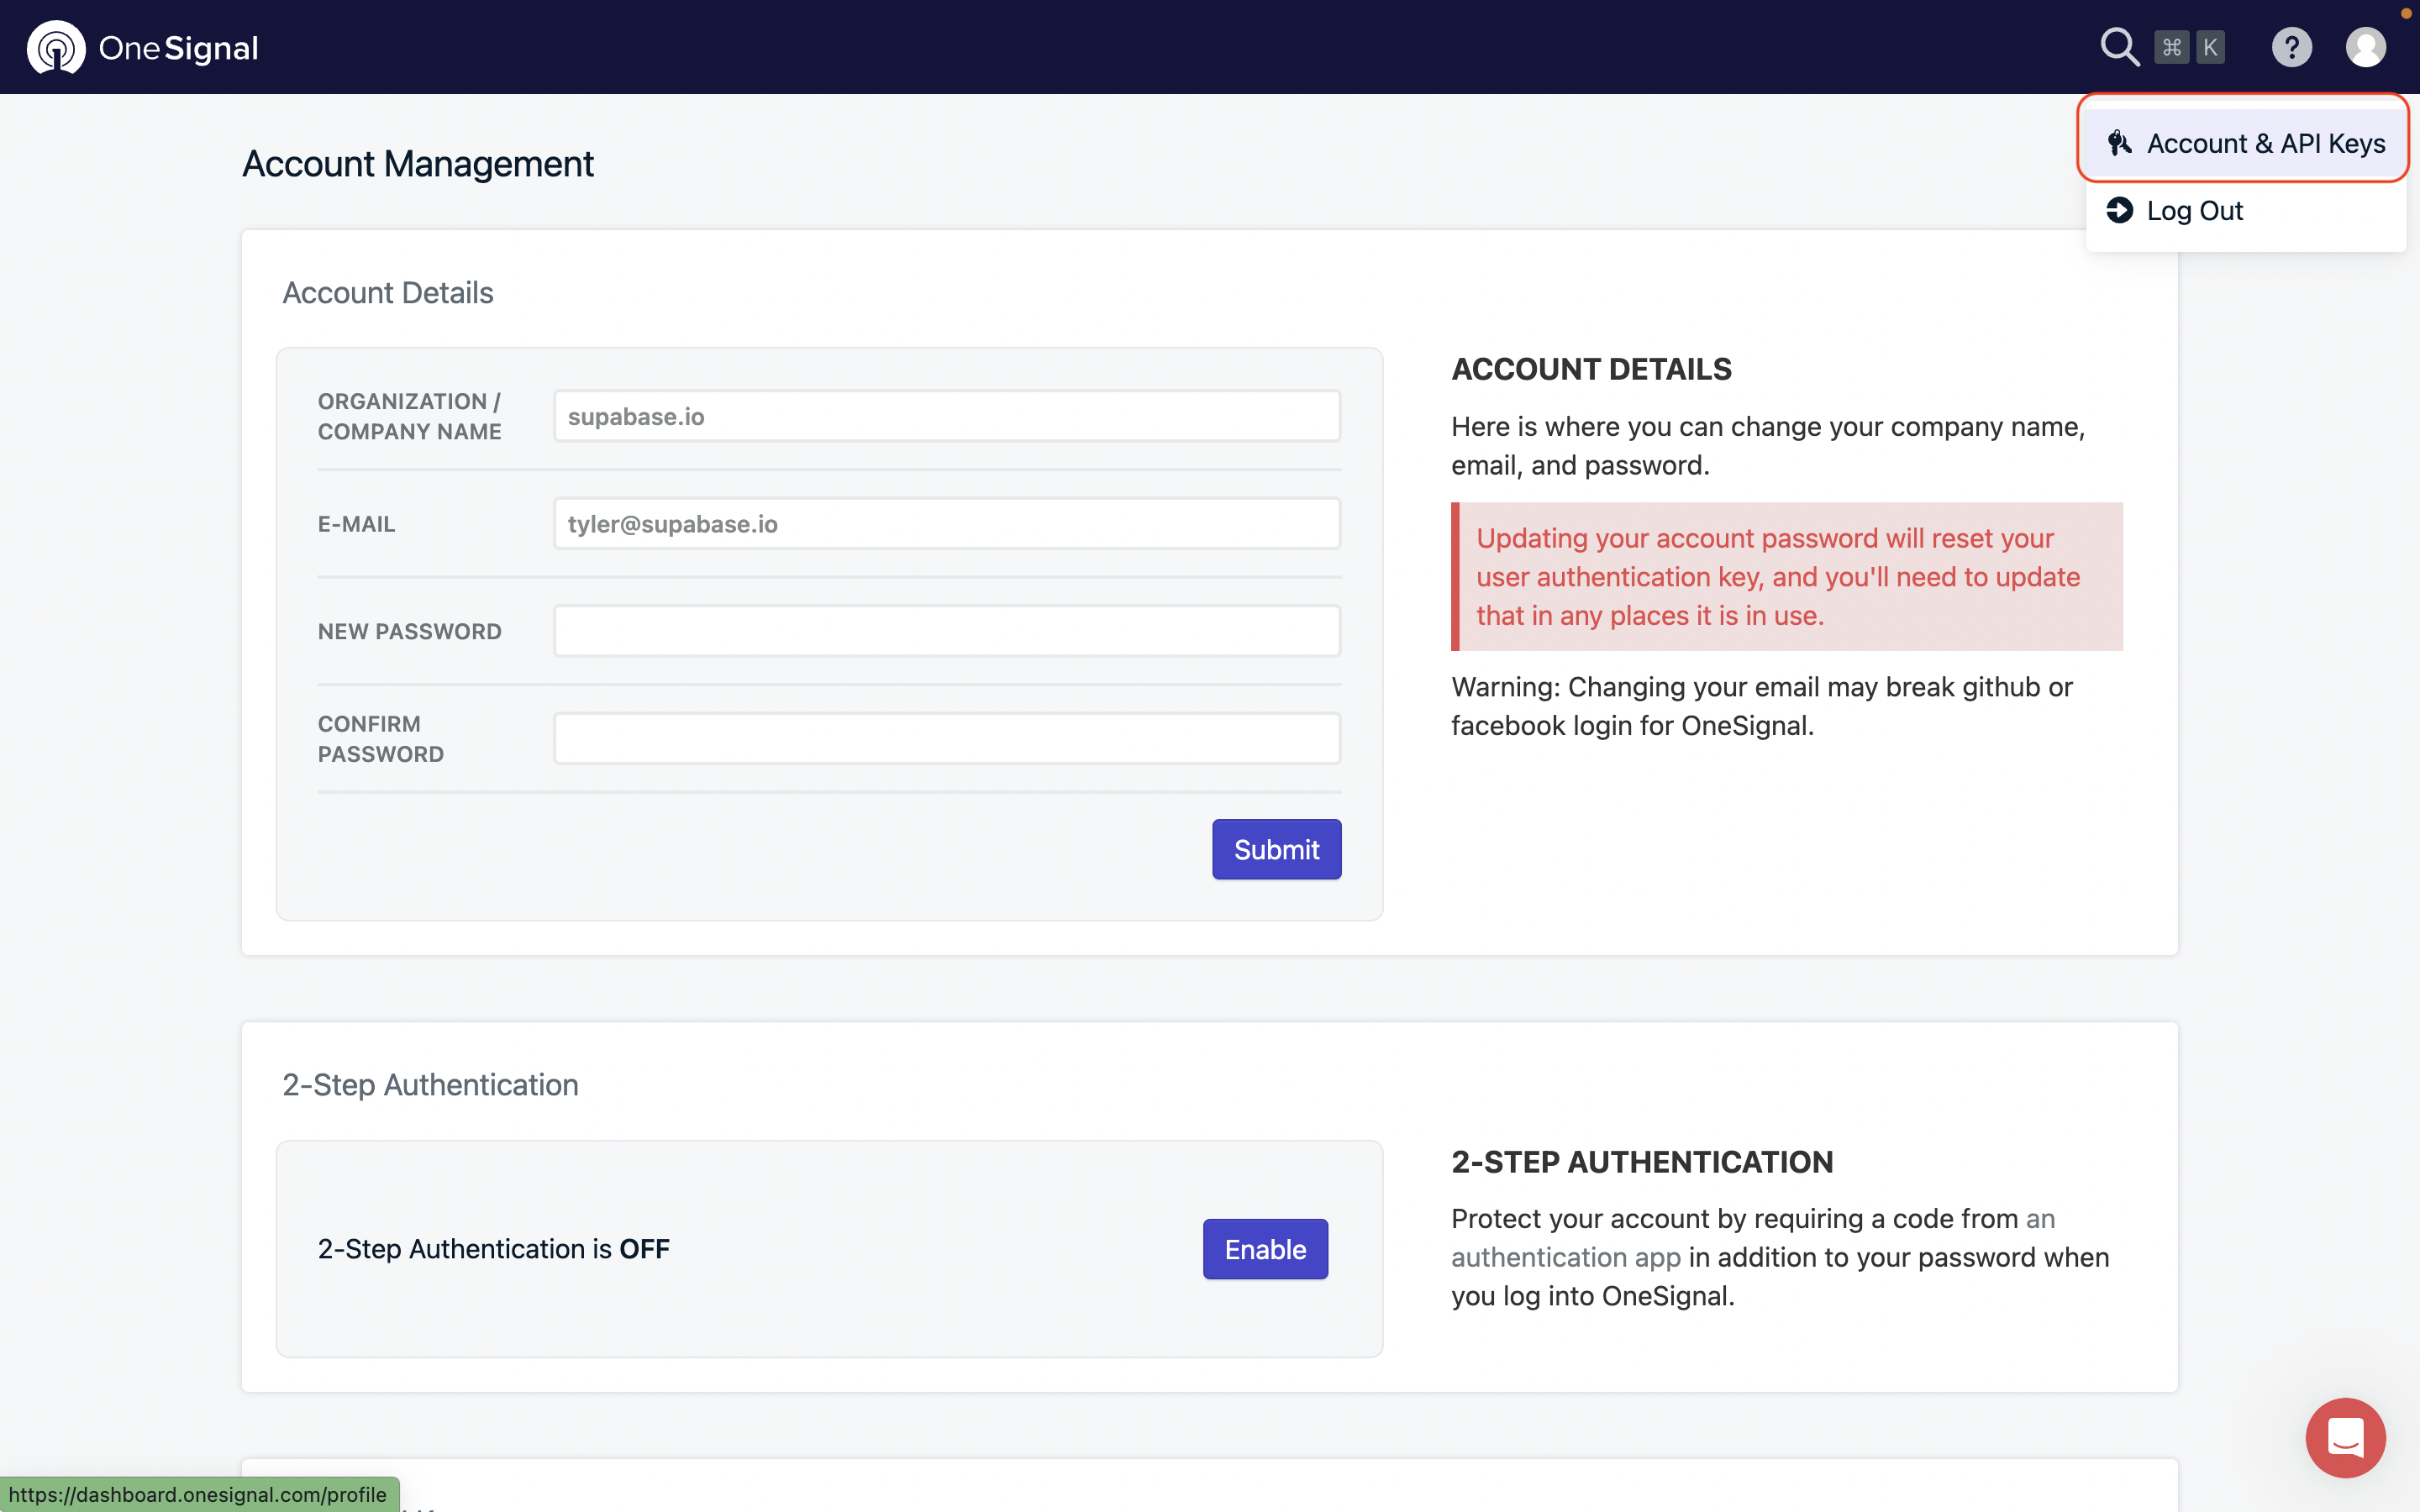
ONESIGNAL_APP_ID and ONESIGNAL_REST_API_KEY can be found under Settings > Keys & IDs of your OneSignal app, and USER_AUTH_KEY can be found by going to Account & API Keys page by clicking your icon in the top right corner and scrolling to the User Auth Key section.
Once your environment variables are filled in, you can run the following command to set the environment variable.
At this point, the function should be ready to be deployed! Run the following command to deploy your functions to the edge! The no-verify-jwt flag is required if you plan to call the function from a webhook.
Step 4: Setting up the Supabase database
Finally, we get to set up the database! Run the following SQL to set up the orders table.
As you can see, the orders table has 4 columns and 3 of them have default values. That means all we need to send from the front-end app is the price. That is why our insert statement looked very simple.
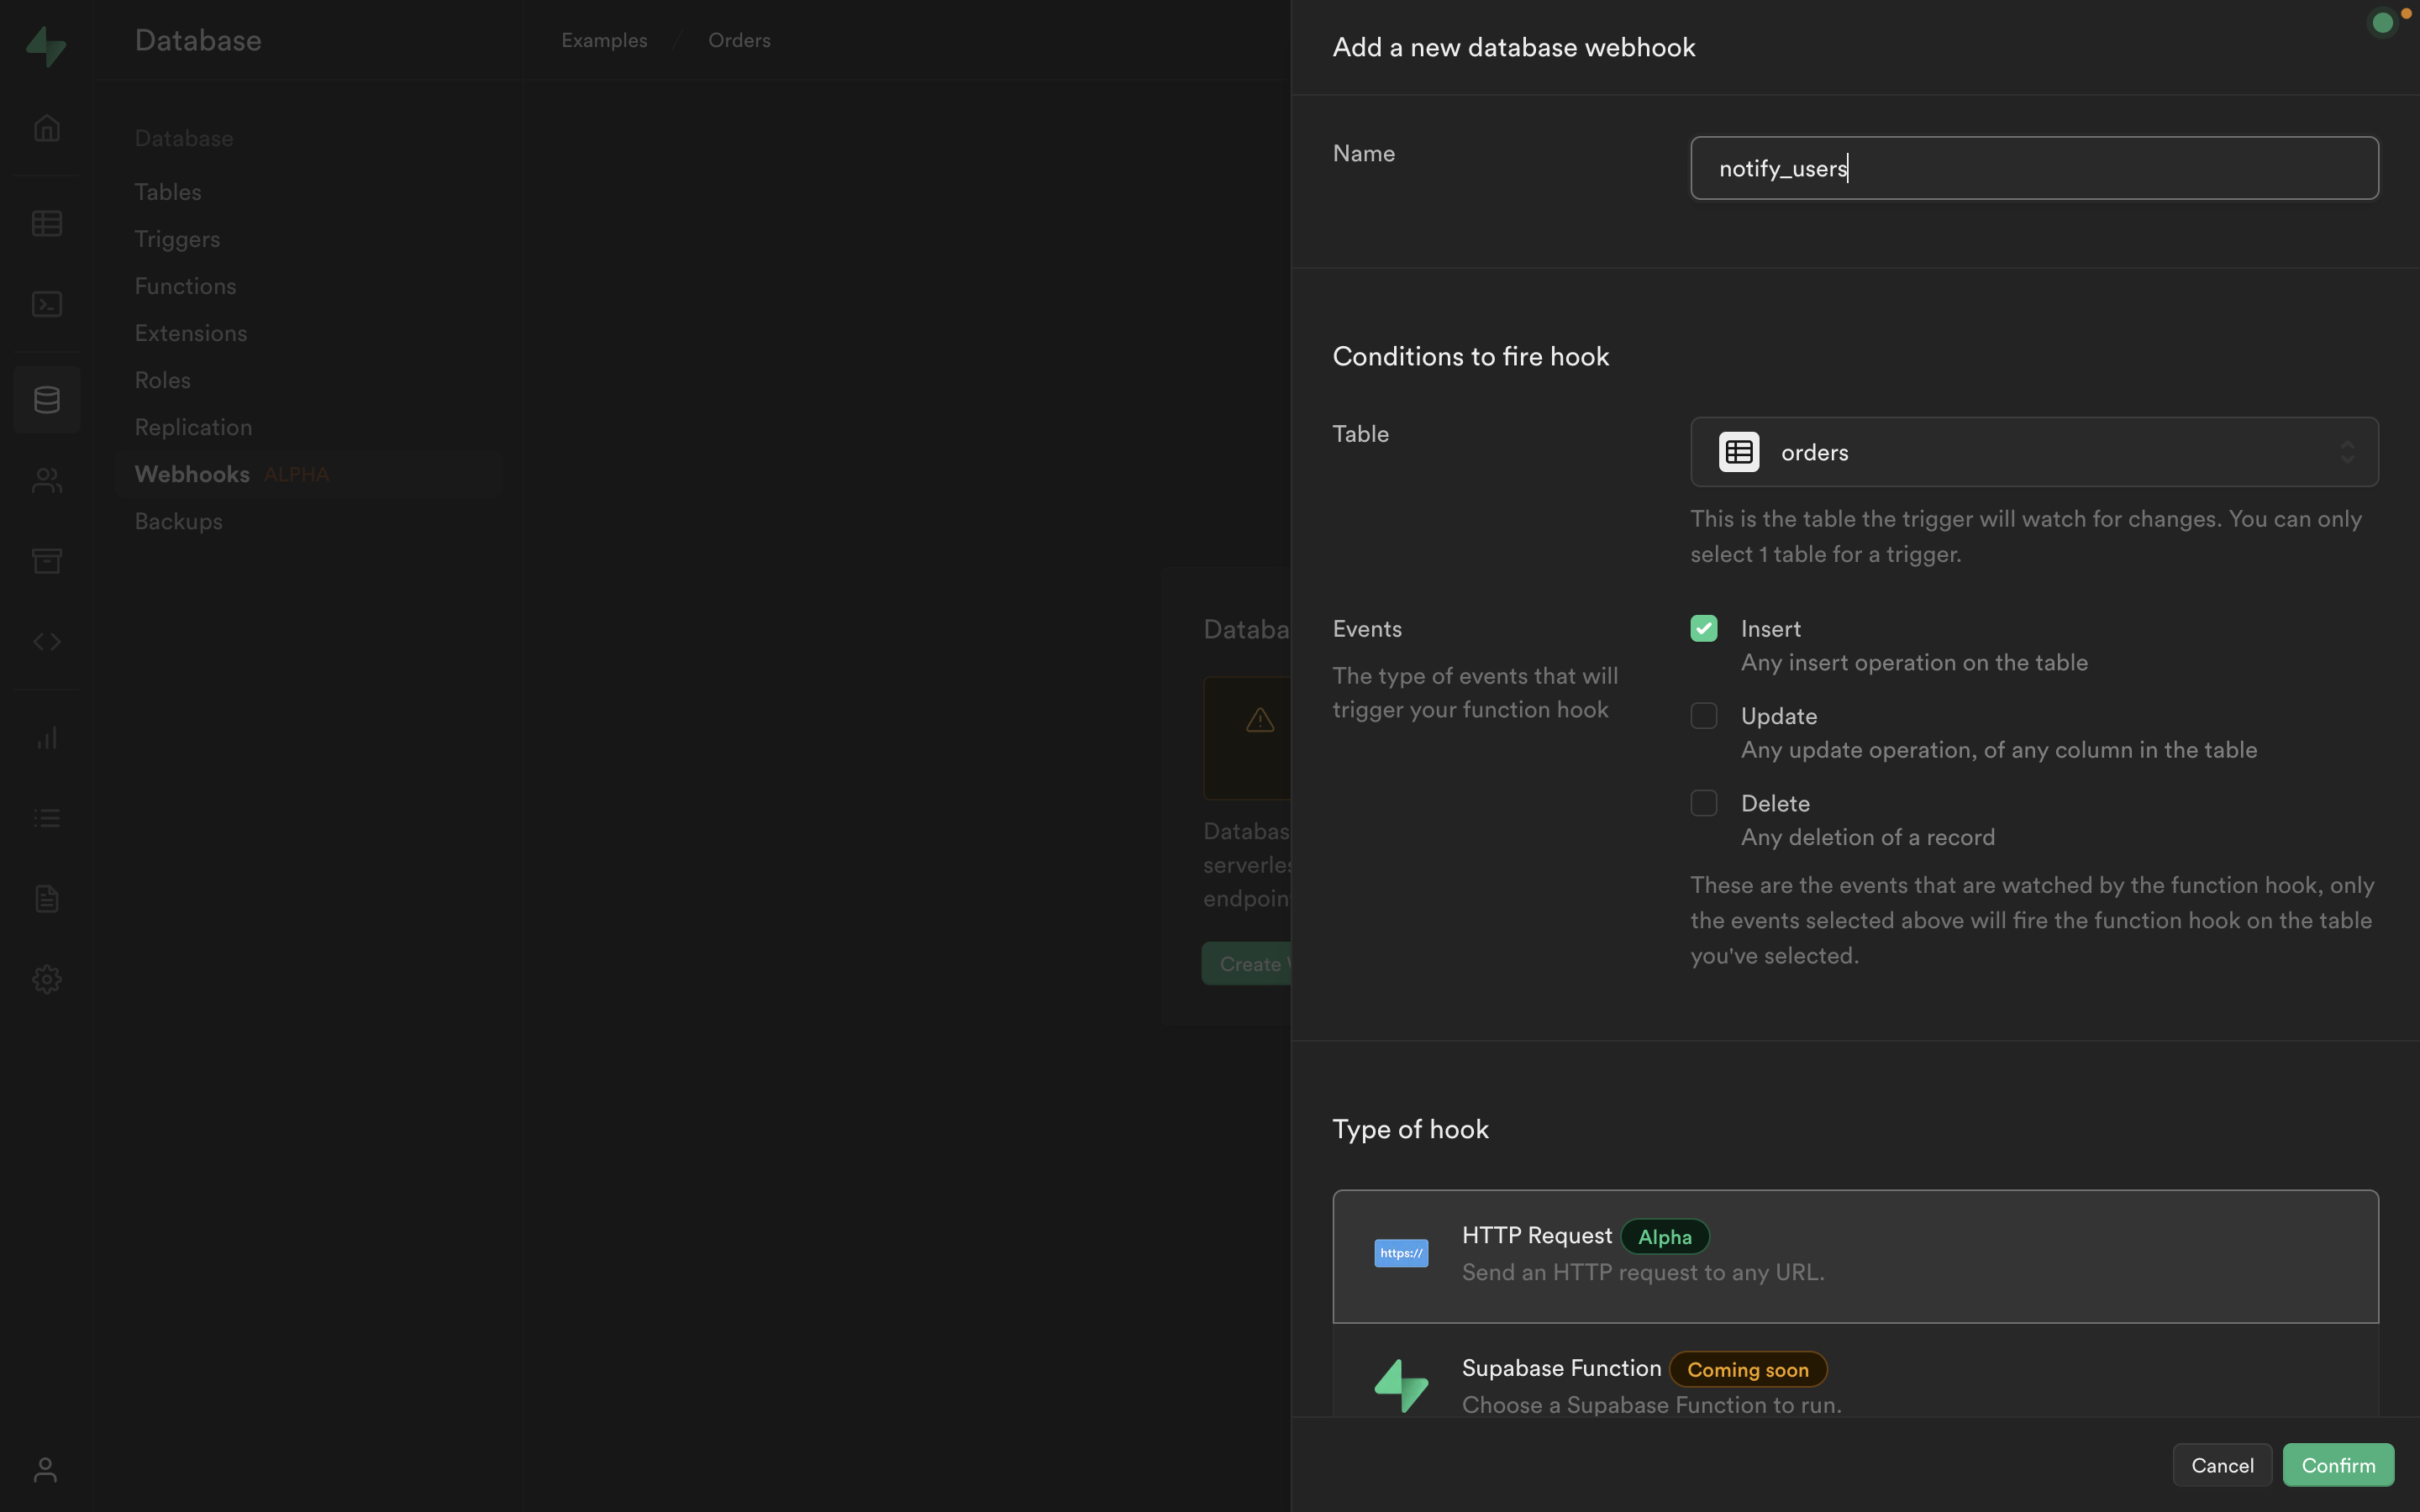
Let’s also set up the webhook so that whenever a new row is inserted in the orders table, it calls the edge function. Go to Database > Webhooks and create a new Database Webhook. The table should be set to orders and Events should be inserted. The type should be HTTP Request, the HTTP method should be POST, and the URL should be the URL of your edge function. Hit confirm to save the webhook configuration.
At this point, the app should be complete! Run your app locally with npm run dev, or deploy your app to a hosting service and see how you receive a push notification when you place an order!
Remember that if you decide to deploy your app to a hosting service, you would need to create another OneSignal app configured for your local address.
Resources
This particular example was using Next.js, but you can apply the same principles to implement send push notification, SMS, Emails, and in-app-notifications on other platforms as well.
Details
Third-party integrations and docs are managed by Supabase partners.